How you display your products can make a big difference to your customers’ buying decisions. When it comes to online retail, increasing sales is key to the growth and success of your store, so choosing the right product display is vital.

Fortunately, you can enhance your WordPress site’s product displays with plugins. Automated product tables and quick view lightboxes can make your purchase process more user-friendly, in order to drive sales.
In this article, we’ll go over some of the reasons product tables and quick view options can improve sales. Then we’ll show you three ways to show off your products that will get customers hitting Add to Cart. Let’s go!
An introduction to increasing sales with product tables and quick views
While how you display your products may seem like a purely aesthetic decision, it can actually shape how customers interact with your site. Customers value the ability to find the products they want quickly, and how you organize your products can streamline the process.
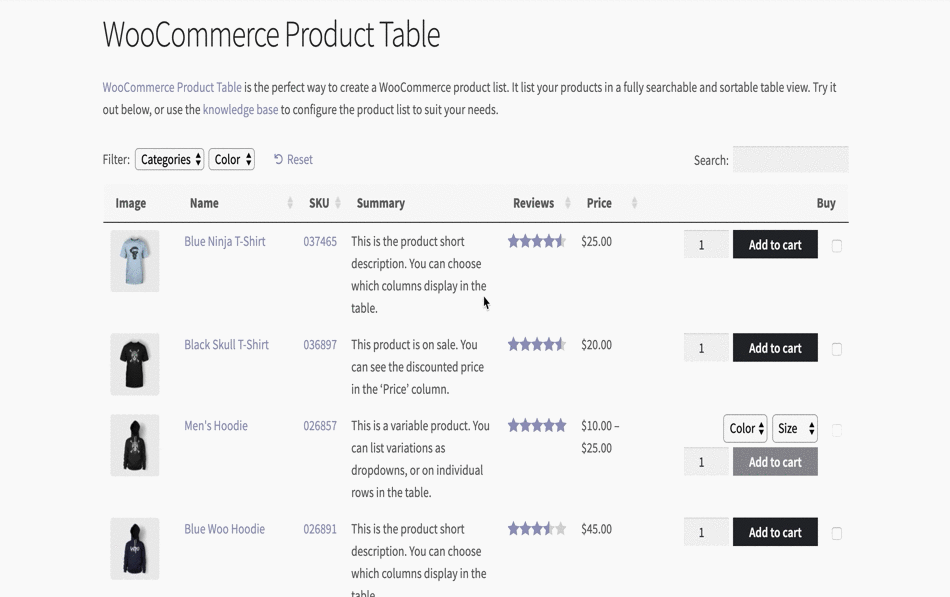
For example, consider a product table, which is easier to navigate than jumping between product pages. What’s more, search, sort, and filter functions can help customers find products they’re interested in with little hassle. Plus, tables make for easier browsing, which could lead to more sales:
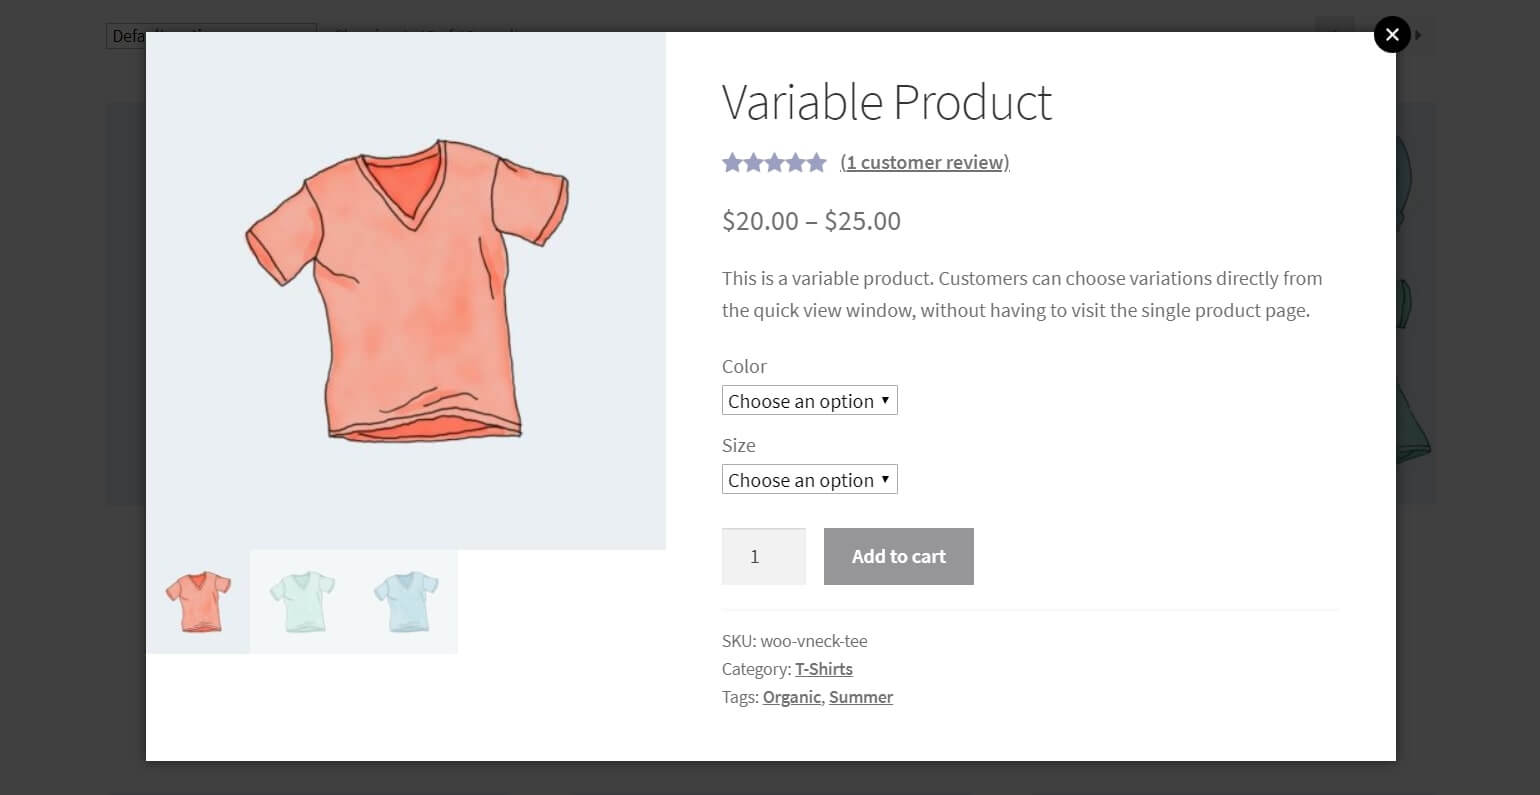
Adding a quick view option for your products can also improve your customers’ experience. Lightboxes enable potential buyers to easily examine key information for products they’re considering, without having to navigate to a new page or wade through details they don’t care about.
Even more importantly, product tables and quick view displays can both simplify and speed up the checkout process. Statistics show that 25 percent of customers who abandon their carts do so because of confusing website navigation. Another 21 percent abandon their carts because of long checkout processes.
By adding Add to Cart buttons to your product table, quick view lightboxes, or both, you can give your customers a clear and speedy checkout. You’ll eliminate confusing navigation by keeping them on a single page, and the purchasing process will be off to a smooth start with a single click.
How to display products to get more sales on your WordPress site (3 methods)
There are many ways to display products on your WordPress site. However, not all of them will optimize your browsing and checkout processes to help you get more sales. Below are three methods that do!
-
Use a product table to organize your items
Product tables keep your merchandise organized, and clearly display all the information customers need on a single page. You can easily add one to your WordPress site using our WooCommerce Product Table plugin:
Get WooCommerce Product Table here.
This plugin automatically generates visually appealing product tables, and includes a number of handy features:
- Search, sort, and filter options for easy navigation
- Product variation and add-on selectors to place complete orders without leaving the page
- ‘Add to Cart’ buttons for fast checkout
- Audio, video, and image displays for enhanced product browsing
You can also include a variety of customizable columns to display content such as product descriptions, taxonomies, prices, and more. The plugin gives you complete control over almost every aspect of the table.
Adding WooCommerce Product Table to your WordPress site
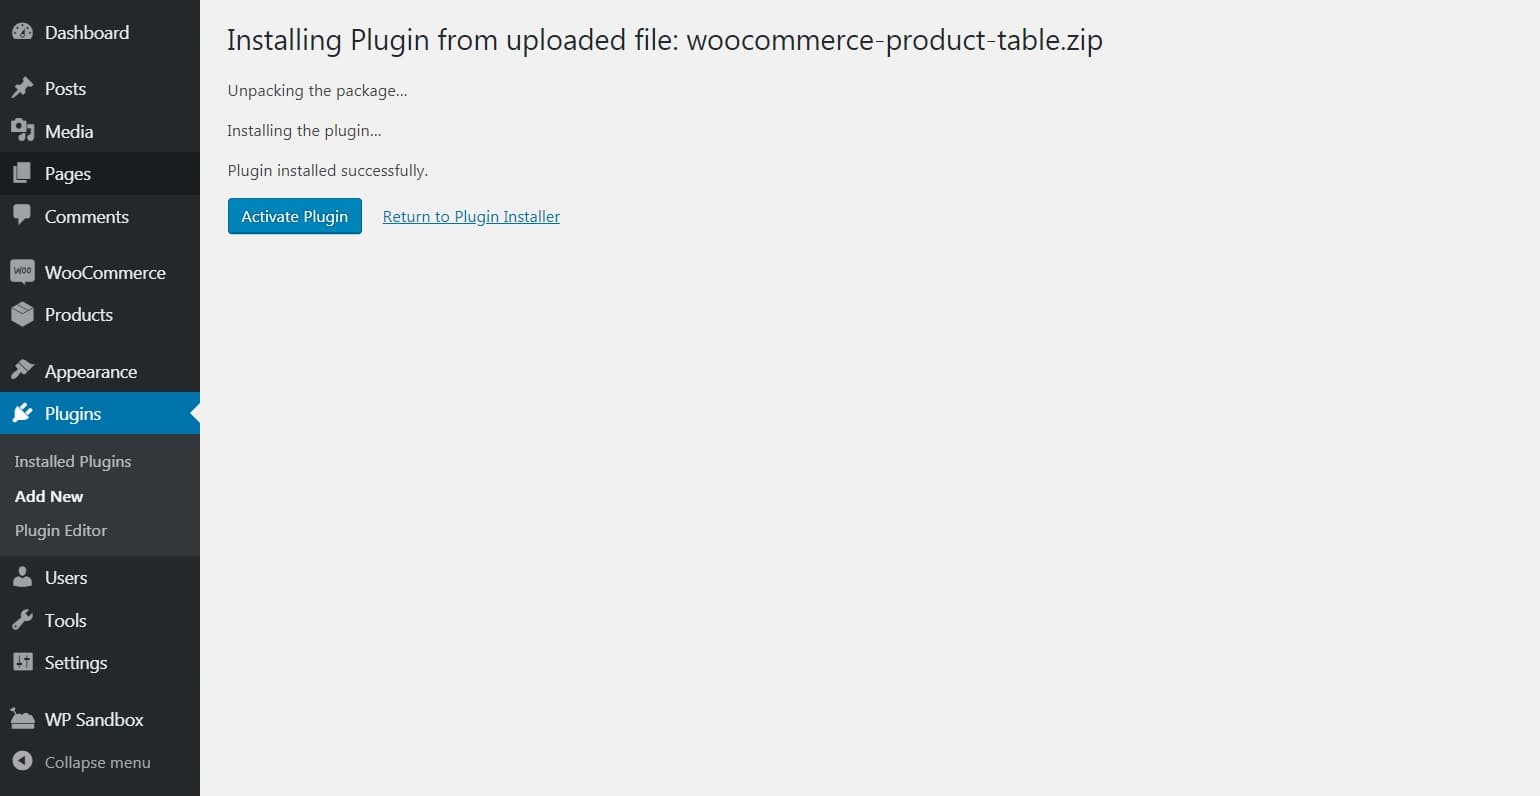
To get started with WooCommerce Product Table, you’ll need to purchase, install, and activate it on your WordPress site. Once you’ve made your purchase and collected your license key from the confirmation email, head over to your site.
Navigate to Plugins > Add New > Upload Plugin and choose the .zip file you downloaded upon purchasing the plugin. After the installation is complete, click on the blue Activate button:
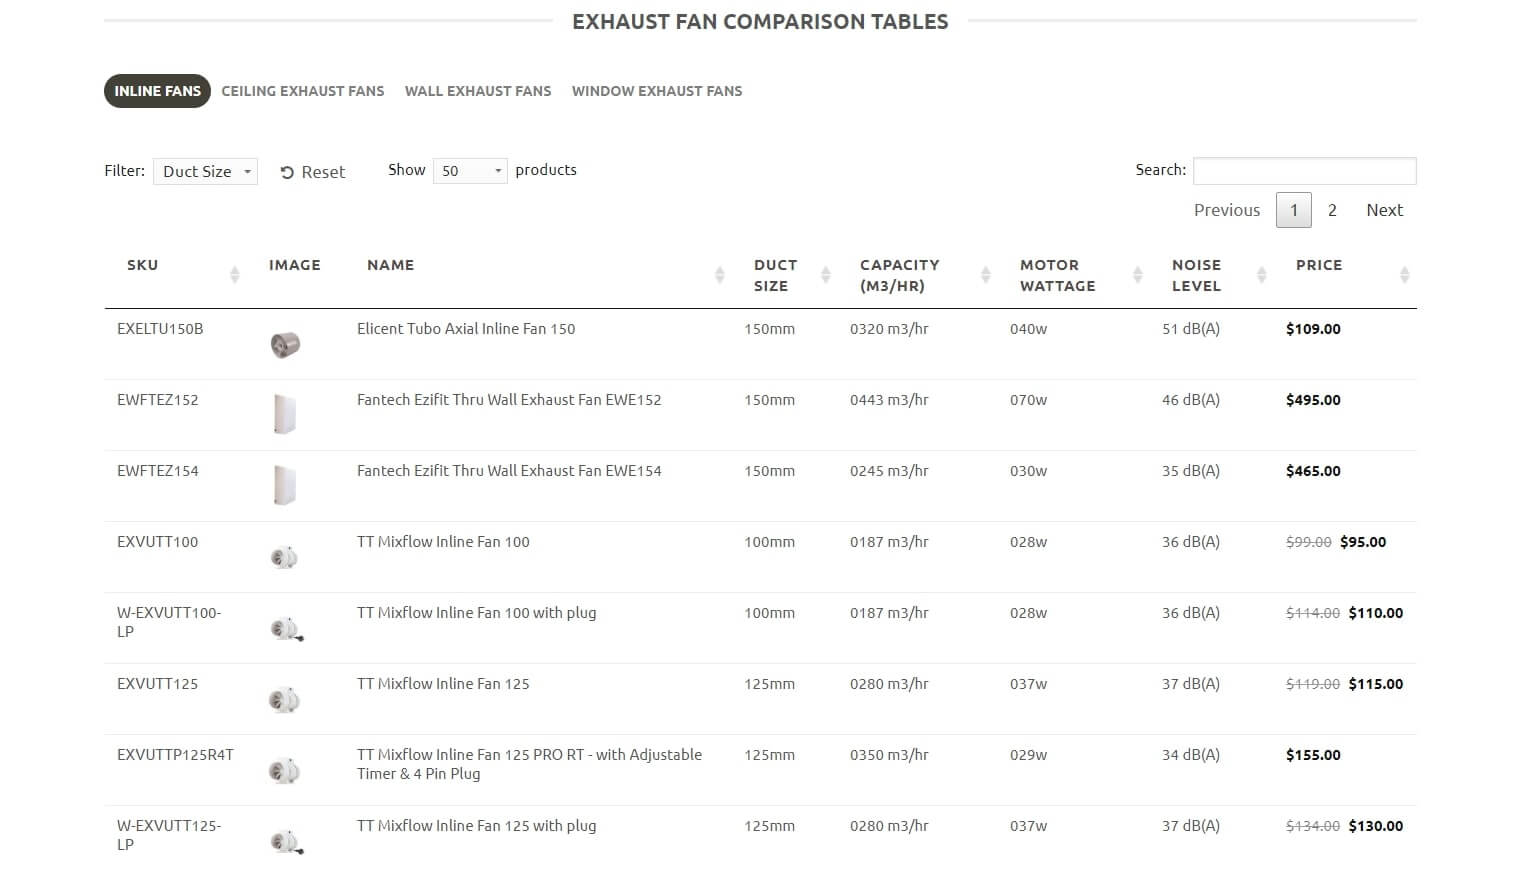
Next, navigate to the plugin’s settings and enter your license key. Save your changes, then configure the settings to customize your table’s styling, columns, content, and performance. After that, you can continue moving down the page to set up functions such as search, sort, and filter, as well as Add to Cart buttons:
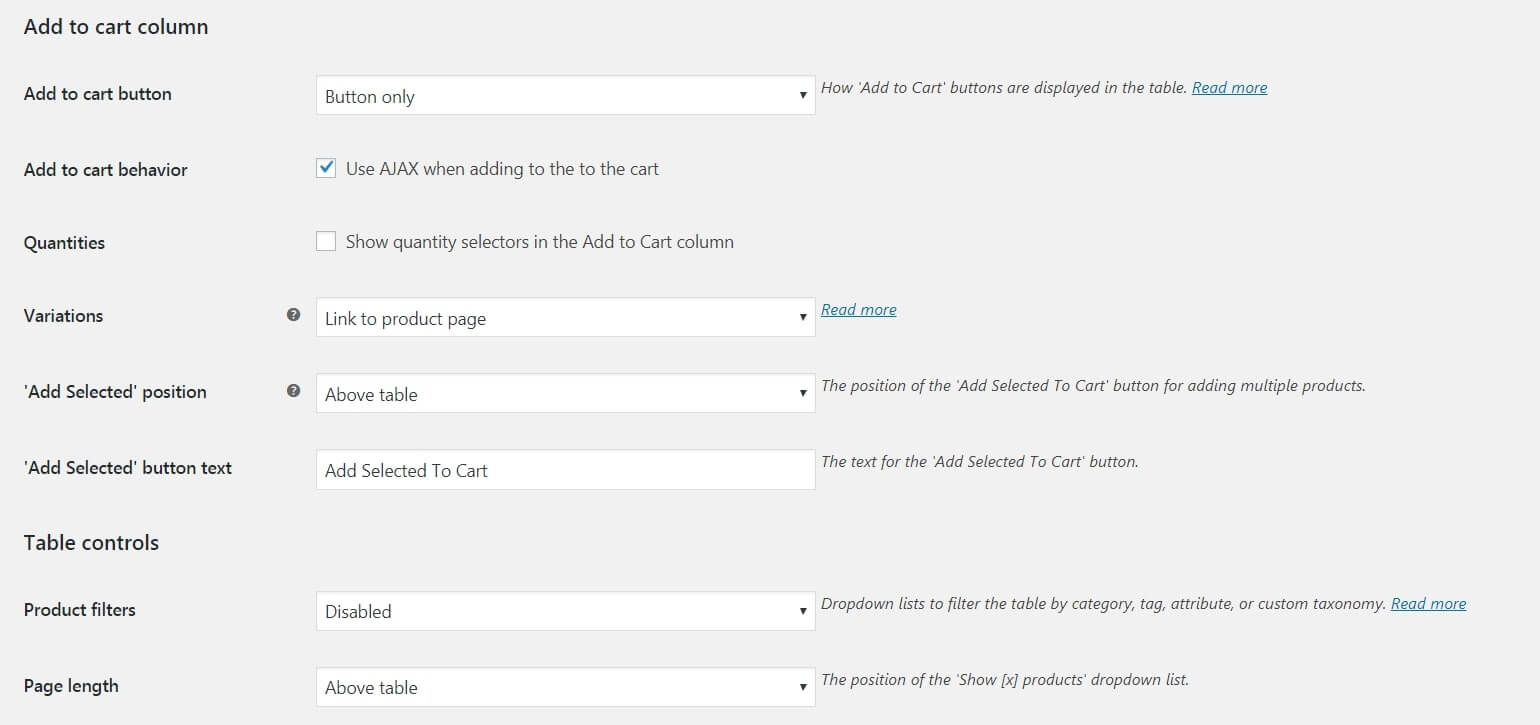
To make it easy for customers to start the purchase process on your table, you can add variation and quantity selectors, too. You’ll also want to specify your table’s pagination, especially if you have a lot of products.
Finally, you’ll need to use a shortcode to display your product table. You can create a new page for it, or show it on an existing one. Simply add the shortcode [no_shortcodes][product_table][/no_shortcodes] where you want the table to appear.
-
Add a quick view option to speed up the buying process
Like product tables, quick view lightboxes help customers quickly access all the information they need to make a purchasing decision on a single page. Custom quick view lightboxes are easy to set up with our WooCommerce Quick View Pro plugin:
Get WooCommerce Quick View Pro here.
Our quick view plugin will generate lightboxes for your customers to get a closer look at products they’re interested in. These displays are customizable, with features including:
- Custom links for opening quick views
- Add to Cart buttons for speedy purchasing
- Product variation and add-on selectors, so customers can complete orders right in the quick view display
In addition to providing several options for how customers can open your quick view displays, you can also determine what content is visible in the lightboxes. Images, galleries, and a variety of product details are all available within the plugin’s settings.
Adding WooCommerce Quick View Pro to your WordPress site
The installation process for this plugin is identical to the one for WooCommerce Product Table. Once you’ve installed and activated the plugin, a default quick view option will automatically be added to all your product pages:
To customize your displays, navigate to the plugin’s settings. Then, choose how customers will open your product quick views. Keep in mind that if you leave the Open from product name/image box unchecked, clicking on these features will take customers to the product’s page. This could possibly disrupt and extend the browsing or purchasing process.
Below, you can customize the button customers use to open the quick view lightboxes if you chose to add them. Then, select whether you wish to display your products’ images, details, or both:
For your images, be sure to specify if customers can zoom in to see visual details and if you want to include a gallery to display multiple images. Check the boxes for the product details you want to include (if any), and make sure the information you’ve selected is included on your products’ pages.
-
Combine a product table and quick view to enhance your displays
While both product tables and quick view displays are useful on their own, combining them can help you create impressive, easy-to-use order forms on your WordPress site. Your customers will not only be able to browse products in your table but also get a closer look with quick view lightboxes.
Plus, using Add to Cart buttons within both the table and lightboxes will make it even easier for buyers to get the checkout process started. If you already have WooCommerce Product Table and WooCommerce Quick View Pro installed, activated, and configured, putting them together to create an enhanced customer experience is simple.
To add a quick view column to your product table, navigate to WooCommerce Product Table’s settings. There, add quick-view to the list of columns under the Table content settings:

Don’t forget to separate columns with a comma. Additionally, if you continue through the product table settings, you’ll come to the Quick View Pro section. Enabling the Replace all links to a product page with Quick View option will cause a quick view lightbox to open if a customer clicks on the product’s name or image. Checking this box will ensure that customers don’t accidentally leave your product table for an individual product page.
Conclusion
Every detail counts when it comes to boosting your online store’s sales. Taking the time to create user-friendly product displays isn’t so much a luxury as it is an important strategy for helping your store become – and remain – successful.
While there are many ways to effectively display your products, in this article we covered three methods you can put into practice with the WooCommerce Product Table and WooCommerce Quick View Pro plugins:
- Use a product table to organize your items.
- Add a quick view option to speed up the buying process.
- Combine a product table and quick views enhance your displays.
Do you have any questions about how to display your products to get more sales? Let us know in the comments section below!

Image credit: Pexels. featured-display-products.jpg
You can also stay updated by subscribing to iTechCode.